Old School RuneScape (OSRS) is a variant of the popular game based on the source code from 2007. OSRS was introduced in 2013 as an alternative to the then-current edition of the game. Most of the content and features that appear in the game is decided upon by the community through a series of polls.
RuneScape has been around for a very long time. The game was first released in 2001 and has evolved a lot over the past 18 years. OSRS allows players to play in a much more classic look and feel.
If you want a taste of what Runescape looked like more than 10 years ago, give Old School a try.
I might be the last person on planet Earth to play Fortnite. OK, that’s a stretch. I might be the last gamer on planet Earth to play Fortnite. That could be true.
Everyone was playing Fortnite last year except me. I never even tried it. No interest. Didn’t want to get sucked into the hype.
But now, a full year later, so many people are still playing it that I decided to give it a try and see what I was missing.
My analysis: meh. It’s more fun than I expected but I can’t see why so many people spend so much money on this game. It’s entertaining, but not worth opening my wallet and pouring all of it into Epic’s already full bank account.
Here are some random screenshots I collected that show what Fortnite is all about.
Two of my favorite cards in Clash Royale are the Archer and the Knight. I use at least one of them in every deck I play and usually both together. They fit well, like peanut butter and jelly. Putting them together is one of the best Clash Royale tips out there.
Let’s take a closer look at both of these marvelous cards, shall we?
Knight
The Knight is unlocked from the Training Camp (Tutorial). He could be a single-target, melee troop with damage that is average and high hitpoints. 3 is cost Elixir to deploy by a Knight card. The Knight has an astonishing mustache, as the description states that are official and wields a long sword.
Because of medium health and his low Elixir cost and damage, the Knight is a good choice to work with together with the damage dealing offense. Instead, the Knight can be used to back up higher hitpoint troops, like the Giant Skeleton or Giant.
As it has fairly high hitpoints utilize the Knight as a meat shield for troops that are smaller. The Knight can just target one target at a time. Using cards including Skeleton Army or Guards will distract and overwhelm the Knight.
With damage and average hitpoints, he can be played both offensively and defensively. Although Barbarians are still advocated over a Knight, he is able to survive a hit or two from a Prince.
He can be supported with Skeletons and Goblins to deal quick and great damage. This combo is not only inexpensive but versatile. Additionally, it gives you enough time and Elixir to defend against your adversary. Deploy a splash troop just like the Bomber in the event the combo fails.
He could be good for taking out glass cannons because of his good damage and attack speed that is rapid. The Knight is really a good counter to the Miner due to Elixir, DPS, and his higher health edge and the Dark Prince.
The Knight should not be ignored by the player since he is able to actually deal great damage. They ought to use troops that are inexpensive to pull him towards the middle like Archers and Spear Goblins, so the Knight gets distracted and can’t get to towers easily.
Archers
The Archers, like the Knight, are unlocked in the Training Camp (Tutorial). It spawns two single- target, moderate -ranged Archers with damage that is low and moderate hitpoints.
A Archers card costs 3 Elixir to deploy. They wield a bow and bear an aqua-blue/red (color depends on side of Arena) cape and an emerald green dress.
Archers are effective at supporting high hitpoint troops, like Giants. They may be used efficiently to counter low hitpoint troops like Minions, Spear Goblins, and Goblins. Placed correctly and together with assistance from Crown Towers, they can still counter slightly higher hitpoint cards just like the Mini P.E.K.K.A.
Archers might be countered with the defensive support of the player’s Crown Towers and also low hitpoint troops. Await the Archers to come to the player’s territory, then spawn low hitpoint troops to deflect them. The Ice Spirit is outstanding for this, as it survives two or one shots from your Archers, and suspends them, causing them to freeze in place for only 1 Elixir.
When facing a Baby Dragon it is possible to carve the Archers so when the Baby Dragon is targeting the primary Archer, the fast Baby Dragon will enter the next Archer’s aggro range permitting the second Archer to target the Baby Dragon from a safer space, shutting it down. This technique also works using a Mini P.E.K.K.A.
Combined with the Zap, they can quickly eliminate a Minion Horde, which could normally survive a Zap. Nonetheless, Spear Goblins really are a much better choice for that as they result in a elixir edge.
They may be alike to Spear Goblins since both are economical ranged troops, but Archers have marginally better stats in every manner except for speed and amount, for 1 additional Elixir. For defense, they are better suited because of the Archers’ wellbeing and damage than Spear Goblins. For instance, Archers can survive one hit in the Baby Dragon, which allows for more damage.
Summer is here and that means more time for beach running. There’s nothing as invigorating as a run in the sand along the ocean.
Here are some beach running pointers for vacationers and coastal runners.
It does not require science to figure out that running on sand is more demanding than running on pavement. Just ask anyone who’s ever been on sand.
Two things are very important to consider about the effectiveness and challenge of running in the sand:
The mechanical work required to get through the sand.
The inefficiency of the work done by tendons and muscles because of the sand’s unpredictable surface.
Because of the ocean and its dynamic tides, soft sand is frequently not the only alternative for beach running and race training.
You’re heading out for a holiday this summer, or in case you live close to the beach, you may be interested in taking your love of running to the coastline. Many runners in coastal areas do this to get a change of pace work out in one of the very most tranquil spots on earth.
For everyone, not all beaches are made equal. In fact, there are a few big factors that could make certain spots for running on, a whole dud.
Run on the Correct Seashore
Length. A jetty, a cliff, a river mouth…so many things can shorten the length of a shore– and turn your anticipated run into a big disappointment. Look for a shore that’s at least a mile of uninterrupted coastline.
Slant. Some shores are unsuitable because they’re cambered, or crowned. Depending on cambered the beach is, this could cause you to run on a slanted surface for a very long period, which can result in harm. The better, the more level.
Surface. For the bunch that was barefoot, some shores are littered with stone and broken seashells which can be painful to run on. Take your shoes with you just in case.
Pick the Right Type of Sand
Depending on the tide cycle, you may have multiple surfaces to select from. And they’re night and day in terms of issue.
The soft sand is the surface that’s not fully wet. It has plenty of give, which makes running on it difficult (thus, why it takes 1.6 times more energy than pavement.)
Sand that is packed, or the wet sand, is what is left behind as the tide recedes. It’s much more solid than soft sand. If you’re new to beach running, visit the wet sand. In case you like to do a soft-sand run, get ready for an excellent work out.
View the Tide
To get the most wet sand to run on (or the most area to run on, if your shore is narrow), make sure to go at low tide, or at least when the tide is receding. Tide graphs are easy to find online.
You will not have any wet sand to run on, in case you head out during high tide or when the tide is rising –or at some areas, you may not have any beach at all.
Choose to Run With or Without Shoes
The wet sand is durable enough you could run with shoes and not be worried about sinking in. But of course, the sand is a soft enough surface to make barefoot running potential, maybe preferable.
Do so with caution, should you choose to really go without shoes. Your feet are used to the support, and at the end of a short shore run, you might notice your ankles, achilles, calf muscles or the very top of your feet are hurting or fatigued.
Check Your Knees
Some beaches have more slanted surfaces than others, but even the most level seashores, at the best tides, have some slant to them. And generally speaking, the more complex the tide angled the sand. Running on an angled surface can wreak havoc on your own knees and hips. Make sure you run out and back. The unevenness is not good for either leg, but it’s better to put both legs through the paces than just one (for instance, running down a beach in one direction, then back on the road). But in case you feel hip or knee pain, stick to degree trails or the roads.
Deep Sand Work Outs
Even when you can not get down to the beach at low tide for the hard-packed sand , running in deep sand once in a while is a great kick in the butt. Sand, like soft snow, gives with every step, which means that your leg muscles (hello, burning calves) will feel the burn. This is really suitable, though, should you not have much time for a run. Doing a quick work out in deep sand will seldom leave you wishing you had more time for a longer run.
Gear Up
Sunscreen is essential, as running next to the water will give you the rays that are reflective in addition to from directly overhead. A hat or visor along with Sunglasses are also helpful in keeping you comfortable and focused on your own run, instead of that fireball in the sky blinding you. And in case you do a lot of shore running, look for shoes that have tight mesh over open mesh. When you’re running on the soft stuff a mesh that is closed can keep your shoes from filling up with sand. And since it’s sometimes unavoidable to get a little sand in, wear socks that ward off blisters. Thin, artificial options function nicely. And if your sock and shoe combo still is not abating the rub, consider a lubricant like BodyGlide or Sportslick for long runs, particularly long runs where your feet might get wet and sandy.
Take Advantage of Where you Are
Nothing caps off an excellent beach run much better than a jump in the ocean (and thank goodness for quick drying run clothing). A soak in the sea will not give you the same recovery gains as an ice bath –unless you’re running on a beach in Maine in the winter–but it will undoubtedly leave you refreshed. And to take advantage of more setting, hop over piles of seaweed or alternative obstacles for agility training, and race the sun as it sets into the water for speed work.
It worked pretty well. Internet Download Manager is a Windows tool that claims to increase your download speed by up to 5 times. It’s not really worth it if you don’t download that much, but if you regularly download big files (like games and movies) it can really help you a lot!
It supports a lot of protocols and services that you need, including proxy servers, ftp and http. It works with firewalls, and handles redirects pretty nicely.
The latest version of Internet Download Manager now supports Windows 10. Check it out, people! And download away!
I’ve been playing Pokémon Go a lot since it was released last week on iOS. It’s really fun and pretty much what every Pokémon fan has wanted forever. It’s great to walk around the real world and pretend you’re capturing actual Pokémon characters. But there’s some really weird stuff happening out there, people. Be safe!
Here you go: the complete guide to Time Tangled Island in Poptropica. It’s one of the first islands, having come out right after Early Poptropica. Fun fact: the original name for the island was Time Twisted Island but they changed it right before it launched.
The Time Tangled Island Walkthrough
First, visit Time Tangled Isle. Walk to the right, and you’ll see a girl before the laboratory. Go inside Pendelum’s Laboratory. Once inside, go down the ramps and after that go all the way and push the stopper that is large collectively. This will activate the Future Machine. Next, hop onto the stopper, and then upwards again to where you see a light that is blue.
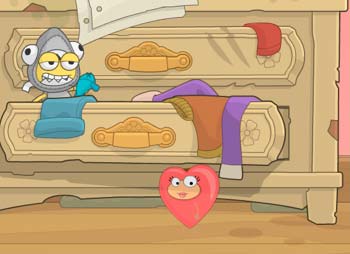
Keep in touch with the girl you met outside the laboratory, and she’ll provide you with an Assignment Printout. You may read the printout by going to your own stock, after you receive it. Now, enter the blue light. You are going to appear in a dystopian world of orange-brownish or muddy green colour and insects the space that is polluting.
Go all the way woman (depending on whether your character is a boy or girl) that looks like your character. Speak to them, and they will introduce him/ herself but 50 years older.
Request if they will be able to assist you to fix advertising yesteryear, they will provide you with a thing which can help you travel time – the Time Apparatus. The time device can also be used by clicking on the full time apparatus icon now situated at the bottom left corner of the game display for easier accessibility, although it is in your stock now. The time apparatus is used by click.
To be able to save the future, you find the missing artifact of another period of time, must travel to the distinct time periods of days gone by, and return it to the initial period of time. You may do this in any sequence. Following is an instant look and everything you should give and get from every period of time, but notice that these aren’t the only things you will want to discover:
Mt. Everest (1953): get Statuette give Goggles
Statue of Liberty (1882): get Laptop / give Statuette
The Graff House (1776): get Salt Rocks / give Declaration of Independence
Mali Empire (1387): get Declaration of Independence / give Salt Rocks
Edison’s Workshop (1877): get Section of Rock / give Phonograph
Aztec Empire (1519): get Goggles / give Section of Rock
Leonardo da Vinci (1516): get Peace Medal / give Laptop
Lewis and Clark Expedition (1805): get Stone Bowl / give Peace Medal
Great Wall of China (1593): get Amulet / give Stone Bowl
Vikings (831): get Golden Vase / give Amulet
Ancient Greece (328 BC): get Phonograph / give Golden Vase
Let us begin by clicking on the image of a guy in a blue hood. It is possible to assess by looking at the center of the time apparatus which time in days gone by it’s. In this instance, it’s 1953 AD. The knob will turn green. Press the knob to go through the time that is chosen! (Important fact: all the places are in A.D. time, except Ancient Greece, which is in B.C.)
You may arrive in a place that is cold and icy. It’s Mount Everest. Where you arrived, you should see that a place is to walk on the right side. Keep following the “course” (you should readily find a way to see which way you should go). After some rock climbing and leaping about, you should reach a dead end with a rope. Go up the rope.
Behold, Mount Everest. Pretty Epic!
Now, you ought to have arrived on another stage that was icy. Go to the left, where you’ll see a guy in a blue jacket. Ask him why he is ceased there, and he’ll tell you he lost his scaling goggles. Go to his left and you’ll see some little icy stages hanging above you. Keep jumping higher until you get to the last stage that is icy. You should see a rope. Go on it.
Now you happen to be on another stage that is icy. Go to the left, where you’ll see some little icy stages hanging above you. Again, keep jumping higher until you get to the last stage that is icy. Beware of the falling icicles! Bumping into one will knock you around, that’ll slow you down.
At another stage, covered in snow, you should arrive after a little jumping. Go to the right, and get the brownish Statuette.
Now, select the time travel device. Select the icon with a guy with brownish hair and a moustache (1882 ADVERTISEMENT), and press on the knob!
You ought to have arrived in a location with lots of wood. It is the workplace. Visit the left, and enter the house marked “Gadget, Gauthier et Cie.” Visit the right and speak with the guy there.
Select the third chat choice to give the Statuette of Liberty to the guy. (To do so, tell the man with brown hair, “I found your study model!”) When you give the man with brown hair it, the time period (for 1882) will be fixed! Now leave the home.
Visit the really left, a barrel and where you’ll see a guy alongside a carton. Leap onto the carton, subsequently to the roof of the “Gadget, Gauthier et Cie” house. Go along the roof, and leap onto the chimney. Now leap onto the brownish statue. Then jump to the wooden ledge above, then another ledge. Afterward leap to the left with all your might!
You need to have got a Laptop, when you have landed. If not, simply try again until you are doing!
Snap on the time apparatus again. Now, select the icon of a guy with a brownish pigtail and is wearing a black hat (1776 AD). Go to the right, and make an effort as they’ll knock you to stay away from the hedgehogs. Shortly you should arrive before the Graff House, a reddish house that is very enormous. Leap as much as the rooftop of your house (by using the window ledges).
On the roof, try to find the chimney with a bag of rocks that are white. Jump to it, and grab the Salt Rocks! Use your Time Apparatus and select the girl with a pink turban on her head. Press on the knob and you need to take the Mali Empire, 1387!
You need to be in some surroundings that are really brownish. Go to the right until you pass by your second green bush. Above it thee should be a little ledge. Jump on it, then jump onto the building. There should be some green leaves stage jump on that.
Afterward bound to the building you had been merely standing on, subsequently to the building on the right. You should see a man with blue robe and a white turban there. Keep in touch with the man and say, “I discovered your salt rocks!” The bag of salt rocks will be removed to your own stock (and given to that man you had been speaking to), and the time period in the Mali Empire will be fixed.
Now, jump below the Poptropican you had given the salt rocks to. Will be a snake there. Go to the right, avoiding that snake (in case you hit the snake, it’s going to knock you around!). On the right you’ll see a small ledge. Jump to that ledge, and you need to see another ledge like the one you’re standing on. Jump to that one, also, without falling off and go.
You should see a stump that is brownish to your own right. Bound to it, and you’ll land on another side. Then try again. Continue on with another set, in case you do. Remember to are in the bottom. Simply leap down. You should see a buildng called “Timbuktu Inn” with a large door with round alloys on it. Go inside the door. Once inside the hostel, go to the right until you see a little silver ledge. Jump to leap to the large brown ledge near the top.
Go around until you see a guy wearing white. Speak to the man wearing white, and you will stare at a group of papers. The guy will talk on the bottom left corner to you personally. Click on the man with brown hair until he is done speaking to move the dialogue.
A jigsaw puzzle will appear in front of you. Piece the puzzle together (it just has 18 bits, and it is easy!). The image, when finished, should appear to be a king.
Simply click anywhere on the display, when you are done. The King’ll provide you with the Declaration of Independence!
Now return to the Graff House, 1776. After there, move towards the right, prevent the hedgehogs, and you need to shortly be a large red house in front of the Graff House,. Go inside. Once inside, proceed to the right (until you can not go any further!), and jump onto the platform above you.
There you should see a guy. He’s Thomas Jefferson. Tell the man, “I’ve the proclamation!” The “Declaration of Independence” will be taken off your inventory, and will get to Jefferson. The period of time will be fixed!
Now select the time apparatus again. Choose the icon with a guy with hair that is brown. Press on the knob. You ought to have arrived in Edison’s Workshop (check your map in the event you ‘re unsure what your location is!). Visit the far left side where you should see a a vehicle. Jump onto the vehicle.
Snap on the circle along with the wheel that is larger, and the vehicle will go! Make sure you’re still jump on, when it is quit! Jump onto the division above the vehicle, then jump to the branch above the division you’re on. From there, jump onto the grey roof. Run along the roof until you see a brilliant section of rock on a chimney.
Jump to it, and grab it! You need to have got a Section of Stone, when you have landed. If not, simply try again until you are doing!
Open your time apparatus up again, and select the icon of a man wearing a leaf hat. Press on the knob. You should be in the Aztec Empire. Go to the right until you see an extended set. Scale up until you see 2 individuals that are Aztec.
Keep in touch with the one wearing a leaf hat on the Aztecs’ icon on the time apparatus like the one. Tell the Aztecs you’ve the sun rock bit, and you are going to give him the “Section of Stone” you found at Edison’s workshop. The Aztec time period should be fixed.
Jump off the building and go to the right. Halt when you’ve passed by a statue. Leap around the highest part of the building alongside the statue (not the one you jumped off of a while past) until you see a vintage woman. Keep in touch with her, and she’ll provide you with an Aztec Warrior Headdress. Put on, then jump off the building.
Now speak with the guard near the long set, and go to the left. He’ll give you Goggles. (Remember to have the Warrior Headdress on.)
Open up your time apparatus again, and return to Mount Everest, 1953. Go back to Edmund, the man in the blue jacket you met on Mount Everest.
Should you not understand the manner, re-read the instructions in the section above labeled “Mount Everest, 1953”. Speak to Edmund and say to him, “I discovered your goggles!” The thing “Goggles” will be transferred out of your stock to Edmund’s eyes. The time period will be fixed.
Go to your own time apparatus, and choose the icon of a guy with gray beard and a brown hat. Press on the knob, and you may be brought to 1516, Leonardo da Vinci’s area! Once you get there, go all the way to the left until you see a sign that says “Leo’s Workshop.”
Leap onto the signal, then leap onto the large stone before it. From there, jump up the 3 rock ledges. On the third rock ledge, you’ll see some grass. Bound to the grass on the right, and keep going right until you see another “Leo’s Workshop” sign. Above it’s a rugged thing, jump on it, then go to the right where you need to be walking on a wooden stage. Cease when you see a difference. Afterward leap to another side of the wooden stage. You should see a guy there.
Above the guy is a little wooden stage, jump then jump on the one. There should be a little swing-ish ride thing near the stage. Hop onto you, and it will ride midway down the rope. When you cease going, bound so far as you can to the top left corner, and you need to land on another stage that is wooden, keep going to the left to track down a stone house. Enter through the door. Once inside, go to the left and jump on the stage there. From there, go to the left until you see a rope. Climb the rope up, and leap down on the machine thing.
Then hop onto the stage and keep going until you see a guy wearing brownish. He’s Leonardo da Vinci (Leo). Speak to Leo, and tell him, “I found your laptop!” The laptop you found (Statue of Liberty) will get to him, and will vanish out of your stock. The time period will be fixed!
But as a benefit, you will be given a Glider by Leo! This can be worn by you and it’s going to allow you to sort of float in the atmosphere. Place on the glider, and leave Leo’s workshop. Return to where that guy was found by you on among the ledges that are wooden, and under him should be a silver medal, with a white glow around it to allow it to be more easy to locate.
Glide around to the silver medal, and you need to have got a Peace Medal, if you had been successful. Keep trying until you get it, if you were’t successful!
Now return to your own Time Apparatus. Choose the icon of a guy wearing brownish hair and a brown hat with a pigtail inside. You should be in 1805. Go to the right until you see a tree.
Jump the first tree arm, then the second, up and keep going until you reach the tree’s highest part. A beaver will pop his head up every few seconds with a rock bowl. Reach up there and catch the Stone Bowl.
Go back down to the earth, and go to the right until you see the man whose face was the icon Captain Meriwether Lewis, on the time apparatus. Speak to Meriwether, and tell him, “I found the peace medal!” The time period will be fixed.
Open your time apparatus up again, and select the icon of a man wearing black moustache and a grey helmet. Press on the knob. You should be in the Great Wall of China. Go as possible to the right. Pick up the barrel you see there to take the Gunpowder.
Now go to the left until you see the first wooden building construction you passed by a while ago. Jump through to the first ledge, after which the second one (with a Chinese man on it) . Watch out for falling bricks, because they’ll knock you around if you crash into them! Now bound to another side (right side). Above you should be another wooden stage (with 2 grey bricks) jump on that.
Jump onto the broad ledge that is grey above, and go right until you see a Chinese guy wearing reddish robes that are great. Speak to play with a memory game.
To play, simply go through the tile near the top. Subsequently are 8 other tiles. Find a tile that’s indistinguishable. Then the tiles will shuffle. Maintain track of where the tile that is indistinguishable is! Choose the card from the 8 that you believe is the tile indistinguishable, when the man’s done shuffling.
The man will give you an Amulet, if you get it right. You’ll be able to keep trying as many times as you prefer to get the amulet, if you had been incorrect. In addition, if you have already gotten the amulet, it is still possible to play with the game (by speaking to him again).
Now go to the left, until you see another wooden construction above you, in your left. Jump to it, and go a little more. You should see a rope. Catch hold of the rope, and let go facing the left so you are actually standing on another stage that is wooden. Now go to the left, and jump off the stage (construction). Be sure to leap left. You should land on a wall that is grey.
Go around the grey wall somewhat until you see a guy. Speak to him and tell him, “I’ve the rock bowl!” The thing “Rock Bowl” will be transferred out of your stock to the Chinese guy’s possesion. The time period will be fixed.
Use the time apparatus again, and also this time choose the image of the Viking (guy with double pigtailed hair that is brownish, wearing helmet that is silver). You should be on a Viking boat. Go to the right until you enter land. Keep in touch with the first Viking (yellow top, silver helmet, grey hair), and tell him, “I’ve your amulet!” The thing “Amulet” will now be possessed by the Viking, and it’s going to be taken off your inventory. Time period fixed!
Now go to the right and hop onto the long rock stage with some green. From there, jump onto another one, then the last rock stage that is long. You shoud be with the entry blocked by a group of rocks in front of the cavern. Snap on the rocks to use your “Gunpowder” on them. The entry will be cleared, and you’ll lose your gunpowder. Enter the cavern. You will have about 30 seconds inside the cavern to get the golden vase in.
The torch will burn out and you’ll need to try if you would like to get the vase. It’s possible for you to attempt as many times as you like, so do not stress should you not get it the first time!
(Tip: The gold vase is at the base of the cavern. Avoid the water at the base. Do not take your time because in case you don’t go fast, because you do n’t need to make errors and visit the incorrect areas of the cavern! the torch will burn out, but do not be overly quick) You see the vase, go over to it to gather the Golden Vase.
Today open your own time system up, and pick the picture of the gift sporting a complete helmet that is brown with reddish feathers on top. Push the button and you’ll be transported to 328 B.C, to Old Greece. There, proceed to the best and keep in touch with the 2nd gift. Inform him, “I possess it’ll be positioned outside the Treasury in Greece, and the gold container!” them “Golden Vase” is likely to be taken off your stock.
The Treasury may be the building both gift pads are currently standing before. The timeframe is going to be fixed. Before you discover another guy today proceed to the best. Join it near him ought to be a container. From there, leap onto the bright sculpture alongside the container you’re sitting on. Then join the surface of the sculpture, after which leap towards the top-left corner. You need to land on the Treasury’s roof. Move the top around, and Edison’s Phonograph should be seen by you. Move to go.
On the arrow sign up the phonograph product card, you are able to click from your own stock to hear Edison’s real speech singing Mary Had Somewhat Lamb.
Today return to Edison’s Course, 1877. Before you achieve the entry doorway to Edison’s course there, transfer along towards the remaining. Enter it. Before you can’t proceed any more once transfer completely towards the remaining. From there, visit then, and to some regional desk leap onto the point on the top.
Next, jump-up to make the journey to the system that is extended above. Before you visit a guy carrying a red jacket maneuver around. He’s Thomas Edison. Keep in touch with him and state, “I have your phonograph!” them “Phonograph” is likely to be moved to Edison’s possesion from your own stock. The timeframe is going to be fixed.
Since constantly intervals have now been fixed, return to the current by selecting the term and starting Your Own Time System “LAB.” Enter Pendelum’s Laboratory, and enter the future. (If you’ve forgotten ways to get towards the Potential, browse the phrases in the top of the site.)
You’ll now maintain The Near Future! It’s really a great place here. Have a great time discovering it! Follow the following group of directions to understand how-to declare your incentive while you’re ready.
Transfer completely towards the right when you’re As Time Goes By. From there, fly-up towards the Monorail Visit utilizing the orange pipe that’ll take at you up there. Watch for the Monorail get inside, after which to reach.
Whenever you achieve the finish rise up the very best of the Monorail, and it’ll take you up near where the Hanging System is situated to location. Proceed to the remaining to obtain the Hanging System should you were arrived on the platform.
The Hanging System ought to be correct alongside you if you were arrived in a natural grassy location. The Hanging System is little, and grey colored. Jump about it to increase. That’s where you receive down while it prevents. Leap onto the lawn system in your left, transfer enter the orange pipe there, and left. You’ll now maintain your Atmosphere House!
Before you arrived at a niche at your Atmosphere House, proceed to the best. Leap within the space, and you ought to be on an identical system towards the one you stood on, except that it had been on another area. Move completely and you must observe somebody there you, just 50 years as time goes on!
He or she provides you with the Full Time Twisted Area Medallion, the mission prize and breaks to invest within the Poptropica Shop. Congratulations, the ages were saved!
This is a step by step walkthrough of Shrink Ray Island with keys and all the cheats for the experience!
Go out to the building and move on right to the Avenue A and locate CJ’s flat.
It is possible to understand their flat because there’s a cat standing. The cat will even go inside and you should get him go out to the home, when you enter to the flat.
Now go to when you are doing that a cloaked man will appear and the computer table and allow you to shrink.
Now make an effort to visit the blower, turn the blower on and leap above the drawer and a thumb drive will be revealed under the bed. Pick it up and move to the right.
You are going to be on the computer table if you look beside the notebook into the microscope, there’s a note about a missing creation.
Run to the privilege to get to another section of the bedroom and after that go right again to enter the family room.
A remote control in addition to the fridge.
Run to the right and push on the yellow sponge and jump on the drawer.
On another website, a piece here which you should get and it is on the far right side along with a table.
Getting there’s somewhat catchy!
First, shove on the rolling pin to ensure it knocks the teapot onto another burner. It’s going to lift you up to the Drive and ledge oil over so it begins dripping out. Go down to the ground to ensure it is under the dripping oil after which shove the cat’s food bowl. Now jump on the counter after which discover cat food bag and jump into it repeatedly to make tons out. You should jump on the counter least 45 times. Oil and the food will stick together forming a stepping stool from the cat food you can use. Go down to ensure the cat food bowl is underneath the table and shove it to the right. Walk to the right to get the piece of paper.
Pick up among the purple grapes, which you will need for another job, afterward before you go.
Visit the left side on the first section of the kitchen. Jump on the counter and run to the toaster. Select the stopper to plug it into the outlet.
Leap handle stand there for several seconds and while holding the grape. You will land on a ledge with a cup filled with utensils, a spatula, and a salt shaker.
Shove on the saltshaker until it’s at the end handle.
You will then land in addition to the fridge, where it’s possible to pick up the remote control.
Bound above to the right’s antenna and you are going to be electrified. Due to this you bound to the portrait and can stick on the balloons.
Jump to the left and you’ll see fish food, shake it 5-7 times so you won’t be eaten by the fish, turn the aquarium away and dive in. Under it’s the diary key.
You got the key, turn the aquarium on and you’ll blow outside.
Now visit the right and push on the yellow and green sponge alongside the Electricity Clean spray bottle on the ground. Bound onto the top on the sponge after which. Eventually, jump to the highest part and go inside it.
Once inside, you need by transferring things to solve a puzzle. Items which can be transferred are clickable. If you move an item that has been holding up others be cautious you would like to watch out that everything does not fall on top of you! You aim will be to get to the top right corner and get the Torn Page.
Run left to leave head and the kitchen to the family room and head back in order to find another hint.
Go left to CJ’s bedroom after which jump on her desk. Use the thumb drive to place this in the computer. The right password is m4r13 cur13. The patterns for the shrink ray firearm will be uploaded.
Jump upward again to get on the ledge with the Rubik’s Cube and her diary that is green. Afterward use the page that is torn to complete part ripped and you will get message. It seems like the robber is close by!
Jump on the thermostat and get it whirl to reddish so the heat turns on.
Jump down and stand alongside the microscope. Afterward use the piece of paper out of your back pack to put it down. Jump up onto the lamp after which bounce up and down several times to bring it down nearer to the paper. Click the light switch, when it will not go down anymore. The secret message is revealed by heat in the lamp from CJ. School coordinates.”
Now go to another section to the left. Use the papers as stages to get up in addition to the bed. Afterward pick up the morse code key in the highest part of the bed. Subsequently stand on each dial and spin them to these coordinates: y – 16 and x – 87.
Look through the telescope. CJ is inside the classroom and she is sending a message to you. Use the secret to decipher the message as she sends them and click each letter. Head for the toilet.
The aim will be to get around and past the tub to the bathroom to ensure we are able to flush the thumb drive. Run to the left and hop on the drawer manages to reach the counter top. Then click the red button. Jump into the stream and to another section of the toilet and go then you will find yourself together with the shower curtain pole. Jump down into the bath. Visit the right and climb the rope up. Afterward stand run to whirl it and handle and turn the water on. The water will fill the bath up in order to swim around to the floating bar.
Leap onto the bar and from there jump onto the back of the rubber duck. Now jump to the left from the bath. Leap onto the stack and onto the red plunger. Then jump around the toilet bowl. Use the thumb drive in your back pack to drop the bowl in, while standing on it. Next, hop handle to send the thumb drive down. Head back how you came to leave.
Establish the telescope in CJ’s bathroom to the same coordinates and go all the way back to it (87,16). Peek into it and CJ has a fresh message. The new message reads, “Robber is Mr. Silva. Now we must escape the flat and save CJ!”
Return to the family room and take the battery from the remote control. Subsequently place . Drive the toy truck and get in left into CJ’s bedroom.
Visit the top where you will locate a publication called, Tess’s Tree by Jess M. Brallier. Push the novel off the shelf to make it form a ramp that the truck can go over and land. Drive over the ramp and you will see a brief cinematic through the glass and where you drive up window out into the road.
Outside the road, you will begin playing with an overhead mini-game that is simple where you must drive the truck down the road while avoiding challenges. The ride it quite simple to finish and lasts over a minute.
Run left and there is CJ!
Now you should prevent the ray gun.
In this game you must hide behind things so that the ray gun shrinks the item instead of you when it appears. Go to the left across the ground. It is possible to pause behind each item or jump one (in case you are quick enough). You must start over, if you get hit by the ray gun. You are aim is conceal to reflect and go to the table and when Mr. Silva attempts to shrink this time to you, the shrink ray reflects off the mirror and hits him!
Click the switch after which you’ll both return to regular size.
Now you’re back on the science fair for solving Shrink Ray Island and you get the isle medallion.
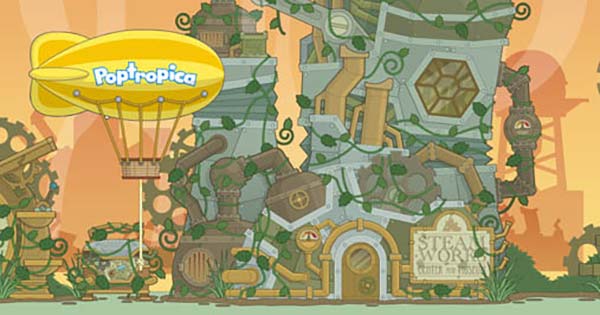
I love Steampunk and Poptropica Steamworks Island is all about a futuristic steampunk-inspired world. Here’s the step-by-step guide on how to beat Steamworks Island in Poptropica. It’s way longer than Early Poptropica!
Main Street
Walk to the Clockwork Cantina and finish the equipment puzzle. Put the two brownish gears and in the middle is gone by the three blue gears. Turn the crank when they are all set up. Pick up the Multitool that only seemed on the earth.
Now walk to the right and you will see a garbage bin. Jump up on it to get the Steam Battery.
Walk to the right and go inside the Museum. Run to the right and you will see a large machine that is yellow. Click on the blue lever to lift the arm. Then jump on the stages and make your path to the upper-right corner. Watch out for the dimmer stages when you step on them that may crumble and fall. Snatch the beaker that is filthy from the display case. Afterward leave the museum.
Return to the Clockwork Cantina. Jump upward and snap on the blue lever here. A mechanical ramp will go. Run it up and leap to fly over the tower and up. You should land in addition to a glass dome. Use your multi tool then drop inside and to open it.
You are now inside the Mayor’s office. Take a look at the note and the painting on the typewriter, which give you an important number to remember for after: 0516. Leave the office, jump back down to the road and run to enter the zone that is next.
Equipment Street
Pass by Sully’s store and visit the blue building at the center. This can be the living quarters. Jump up the platforms and after that run past the door. You will find a robot crab here. Jump up and land to get him flip over and bounce. When he does, he will drop Sully’s key. Pick up the robot crab and the key.
Drop down to the road and visit another building. Jump up onto the steam chute and leap to the roof. You will find a vintage vine here. Pick the old vine to put it in your back pack.
Run to the right until you get in front of Sully’s Steam Powered Paraphernalia shop. There is a Steam Terminal here. Use the steam battery in your back pack. You will get a puzzle here where you must modulate the steam pressure. The beginning pressure is 10 and the finishing pressure must be 5. You must fix the valves to ensure that the pressure will lose five points as it travels to the ending.
Sully’s Store
You will locate a robot once you get inside Sully’s. It is Sprocket! Ring the bell on the desk next to sully to wake up him. Afterward go pick up the rubber mallet in the junk box.
Leave Sully’s and you will be followed by Sprocket. You can ask him some questions if you click on sully. You will learn more afterwards although he is not really talkative.
Head to the privilege to return to Main Street. Then move onto the next zone and run all the way, called the Hub.
The Hub
Run along the ramp until you get into a metal hatch that’s glowing red hot, when you arrive in the Hub. You will find it is much too hot to touch, if you attempt to snap it. Walk up to it and use the robot crab in your back pack. Sprocket the robot will take it and then drop the crab that is inferior along with the hatch. The hatch will be cooled down by the water in the robot so it is possible to open up it.
Go down the hatch. Sprocket can look quite frightened, when you get to the base of the ladder. Make your way down the conduits until you run into a plant giant living inside them. Use the old vine out of your back pack Caution: Hot Steam underneath the sign. This will spray on steam onto the plant beast and kill it. Go to the bottom left and you will find the base of an elevator. Select the round hatch above.
Now you will need to solve three degrees of a ball tilt labyrinth game that is a lot like the classic wooden carton Labyrinth game. Spin the wheel either clockwise or counterclockwise with your cursor to get the ball to the middle. The lift will power up, after you finish all three degrees.
Return upward out of the place to the road. Go several steps to the right and jump up onto the springtime. After three hops, you should land up next to another lever that is blue. Click the giant Hub wheel and the lever begins to go.
Go back down onto the road and run to the left. Leap up and grab the vines and climb as much as a stage. Await the moving stage on the Hub wheel and leap onto it. Afterward jump off in the upper right corner (purpose for the conduit that is yellow). Walk to the right and use the steam valve to jump to the left and up. Continue until you get to the lift entry to the Captain’s Cottage going. Afterward go inside.
A soon as you enter, some will capture Sprocket plant vines. Go down and click on the metal window shutters free him and to snatch the vines. When you do, he will speak to you personally for the very first time and say, “Thank you.” Now it is possible to speak to him and ask him questions and hear his narrative.
Run to the right and use the moving platforms to get around the big painting. It is a replica of the painting.
Select the dial in the bottom of the image. This can be a combination lock. The blend is the amount in the mayor’s office: 0516. Beginning with the innermost ring, click on each triangle to get the wheel. Afterward select it when it is pointing to the amount that is correct. The bands get quicker so this is catchy.
A secret door will open, when you get the mix right. Go interior and you will take Captain Ziggs’ room. Visit the left and pick up the bridge key (on the floor) and the Weed Whacker (upwards on the wall). Leave the room.
Go to the right and down and jump off the veranda to return to the Hub zone. Go right until you get by the end to the Steam Terminal. Use the steam battery after which solve the puzzle. It is just like the first one, but you must correct the pressure from 10 to 16 (6). The bridge will lower and you’ll be able to run, once you are successful.
Creation Zone
Take several steps to the right and hop on the spring to get to the stage above. There is a control panel here with a green button and three reddish levers. Move all the levers after which press on the green button. The giant wrecking ball will drop and reach the earth, creating a hole.
Factory
Jump down and go through the hole. Make the right path to the right and down and you will enter a mechanical room. First, press on the three crimson pressure pads on each side. Then you will want to press on the two pads that are remaining (the ones) at once. Sprocket offer while you get the other to hold down one.
The machine will turn on and the stages that are moving above will begin turning. Use this to get to the highest part of the room. There is a lever on the wall that is left. Click it to get another platform to go. Then leap to the right and use vines and the stages to get into a moving conveyer belt. Here you will want to prevent blobs that drop from a plant beast.
Continue across the vines and shortly you will locate the Mech Steam Motor, 1 of 2 components you will need to fix the Mech. Continue on the vines and go around the Greenhouse.
Greenhouse
Walk to the left for combining Herbicide and you will find an area. Pay attention to the graph on the wall. Use the beaker that is filthy out of your back pack then fill it with three components four parts reddish, two parts green and blue. You’re going to have some Herbicide Mixture, when you are done.
Visit the stage and then around the right above. Use the herbicide on the plant creature. It’s going to shrink and vanish, showing a care cabinet. Go inside.
There is a classic custodian robot here. He is holding onto the Living Quarters Get Crucial. Take it and he will awaken and the alarm system will go off. You can not leave how you came because the security system has a pressure hose. That is where one got stuck this walkthrough. Particular thanks to DR3 from the PoptropicaSecrets.com community who supplied another measure.
Go back from the care cabinet after which climb the vines above. Visit the left and you will see the glass dome has some tiny cracks that are white here. Use the rubber mallet out of your back pack to smash a hole and avoid.
Now run back to Equipment Alley, which will be on the left.
Equipment Street Redux
When you arrive, visit the base of the living quarters building (blue) and jump on the lever on the gear’s right stage. This will increase the one.
Take several steps to the left, then jump up the stages to arrive at the doorway. Use your steam battery after which solve the steam valve puzzle. Now, you should fix the steam by -3 to get it. The door will open. Go inside.
Living Quarters
Go click on the blue lever to make the platform rise. Utilize it continue making your way up and to get to another stage. Jump on the blue button on the ground to make the ladder rise. You will want to immediately jump up the ladder because it falls back down another or two later. There is another door, when you reach the top left. Go through it.
Zack’s Room
Go as much as the top left corner and select the wall to solve another puzzle, which will be a timed game where you must get the steam to go from one corner. You must click the squares to show conduits underneath and then swap the conduits about to produce a path that is clear. You’ll find three degrees to get through.
Go outside and cross over the vine that acts to the left, where you’ll locate the Mech Crank that’s the second bit you must fix the Mech.
Jump down to the road below and go to Sully’s Garage.
Sully’s Garage
Use both the Steam Motor and the Mech Crank out of your back pack on the Mech. It’s going to be fixed and you can now walk in the Mech. Is this the coolest thing in what or Poptropica? You will also get a teleporter apparatus you may use to immediately travel back from everywhere you go on Steamworks.
Walking in around to the left and the Mech, head from the garage. There is a huge doorway. Attach out of your back pack to the Mech after which use the spacebar. Go through the doorway when it is not unclear.
Storage Room
Now you are inside a storage area. Make your path through, using the space bar to smash smash plant beasts that strike. At one point, you will want to leave power and your Mech up among the elevators. Afterward return in the Mech and ride up it to another stage.
Continue killing plant creatures as you go until you dispose of him and get to the closing plant giant in the room. Go to the next zone through the doorway.
Wind Zone
Go down the ramp and you’ll locate a giant windmill. Walk to the blades and Sprocket offer to help.
Leave the Mech and stand as they whirl to ride nearly to the top. Then jump onto the stage above. Use your multi tool to stop the blades. The door will be opened by Sprocket.
Get back in the Mech and go through the doorway.
Hibernation Centre
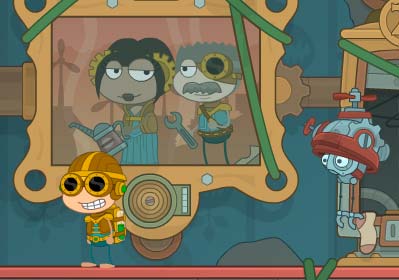
And we eventually learn the secret of what happened to all Steamworks Island’s inhabitants. First, leave the Mech and visit the machine. Use the multitool on it and the room will light up.
Zack will appear from concealed hibernation chamber and Sprocket and he will be reunited. Sweet!
The mayor may also appear and tell the story of what occurred to you. Then you definitely’ll see and hear lumps from below. There is still work to be done.
Jump around the stages and get the Hazardous Blaster. Afterward return in your Mech and attach it.
Take the lift down.
Tunnel System
Go through the room and shoot down the plants that are attacking by using the spacebar and training with the mouse. Kill all the plants.
You would like to find yourself on the stage above the ground. If you miss it, you will want to stand on the bolt/screw thing and whirl it to raise up yourself.
A going stage here. Wait for this and then ride it across to the doorway and prepare for the final conflict…
Plant Hive
You are now in the final boss battle. There are three manager creatures and to make things even more demanding, acid begins to fill the room from below. If you touch the acid, you must start over and lose. You just have a brief time to conquer each boss creature.
The fundamental technique for all three creatures will be to get up so they attempt to hit their heads against you. It is kind of like the Hydra. When they do, it is possible to fire at them. Each creature has to be splatted three times and it’ll vanish and you’ll be able to go forward.
After you conquer the closing plant creature, you will reappear next to the mayor, that will present the isle medallion to you. Congratulations, you did it! Hooray! Sweet!
Let’s face it: instruction to run 13.1 miles is no easy thing, notably if you’ve never coated this distance before. There are numerous tactics to half marathon training and no clear “right” or “incorrect” method to approach it. There are plenty of variables, but it is also easy to fall under poor patterns and simple mistakes during your instruction program. Here’s an appear at some of the more common faults that beginners make and some advice on the best way to correct them.
1. HARM
Most new runners usually make the error of piling on mileage way overly quickly. There’s a lot of excitement in the beginning, after you’ve determined to start training and given to the goal of finishing a half marathon. Inexperienced runners normally start training without even building-up a base during the pre-training period, which normally contributes to discomfort inside their shins or knees. The runner will not be competent to complete their training, if these aches and sores are discounted. It is necessary that you be mindful of any warning indications and the manner in which you handle them. Start out easy and you must be smart. Trauma can prevent you from realizing your goal. Follow a pre-prepared half marathon training program and the easiest method to prevent harm is to start slowly. Stick to it and avert the temptation of covering a lot of miles overly rapidly.
2. HYDRATION
Most runners normally suffer from dehydration because they significantly underestimate how much water their body needs throughout training. It is necessary that you just keep your body well-hydrated throughout long runs. As a general rule of thumb, you should consume 3-6 oz of water every 15-20 minutes throughout your runs. If you’re experience thirsty for quite long runs, including races, use up more water. For runs over an hour or so in duration, you should switch between water and a sports drink, which will help replenish sodium in your body. You can weigh your self before and after running, to get an even better sense of how much liquid you need to consume during an operate. This can help you get your weight back before it phase began to where it was.
3. WANT OF KNOWLEDGE
Most new runners regularly decide only start running and they want to run a half marathon. They do not do any research, make a schedule or seek advice; they only just start running. They often think that getting in shape for a half marathon entails only running, which is not the instance. It is necessary that you just prepare yourself before you start any form of training. You should not fail because of ignorance. Having an acceptable agenda, running appropriate research and discussing to other seasoned runners can allow you to prevent any injuries or dead loss.
4. BEGINNING TOO RAPIDLY
Generally, new runners start their training nicely but finish-up feeling that they’ll run several more miles or hours contrary to their own agenda. You’ve got is there for a motive when instruction for a half marathon, the plan. Most professional trainers will let you know that there is sense behind slowly raising your mileage each week. You might be raising likelihood of harm to you, when you go that additional mile or hour. Stick to the plan you’ve got and you are going to attain your goal.
5. INCORRECT TRAINING PROGRAM
This links to goal-setting. Most runners follow a program that is highly difficult because they would care to attain more within a specific time. This normally contributes to harm since your body cannot manage the program. Because of such exhausting plans, runners finish-up discontinuing. The sort of instruction program you’ve in location has to be successful and practical.
6. NOT STRETCHING
Most new runners normally do not stretch before and after instruction. They regularly uncover themselves having tight and sore muscles, which results in harm. You shouldn’t disregard the need for stretching. Gains of extending comprise matters such higher flexibility, lengthier strides, as less soreness and significantly more.
7. HAVING NO REST DAYS
Every runner has to have a training program that is certainly inclusive of days of rest. These are the times when you participate in easy cross-training tasks or take a whole day off from your own training regimen. Enabling your body to take a rest from your training plan reduces the risk of injuries like shin splints and stress fractures. Additionally, it is better to simply take a psychological rest from running. This can help you to remain supported and stimulated. Overtraining does more hurt than good, so always attempt to prevent it.
8. SETTING THE INCORRECT GOALS
Typically, new runners establish a marathon finish time goal. The goal you establish for the first half marathon should be purely to finish the race. Shoving yourself too much can radically increase the odds of harm even before the marathoner itself. You’ve got to be smart and establish the right targets.
9. MOTIVATION
For most new runners, lots of matters tend to come up throughout the training period, which generally causes them to lose the motivation they demand. You’ll likely miss an operate or 2 during training because of various grounds. However, you shouldn’t lose sight of your goal. It is necessary that you just see each situation as being positive. To be able to remain prompted, you should remind your self of the experience that you simply get when you attain your goal.
10. NOT BELIEVING IN YOURSELF
Typically, new runners uncover it really difficult to complete the first 5 miles of the run. They normally do not see how they can maybe run more than that and participating in a half marathon looks frightful. At this point, it is extremely easy that you give up. However, it is significant that you just believe in your self. This really is only method you can attain your targets.
11. NO SUPPORT SYSTEM
Most new runners do not share their targets with their household, pals or co-workers. It is because they fear so much what they’re going to say. However, telling someone about what you mean to do is truly a great thing. It’s going to give you that additional motivation. Most folks are usually supporting; all you must do is inform them you’re coaching for a half marathon. You do not have to keep them continuously updated of your progress, but you can keep them educated. Having a support system and running a marathoner entails some levels of feelings can assist you to attain your goal. Boost out of your nearest and dearest can assist you with your training considerably more than you think.
Running a half marathon is definitely difficult. It requires determination, effort and nerve. Without these key elements, you’re most probably never to succeed. You can always work on them-and be better, even if you make some blunders when instruction. The most useful thing you can do is function on them and learn from your blunders.